
How to use WEST SYSTEM Epoxy
Surface Preparation
Whether you are bonding, fairing or applying fabrics, thorough surface preparation is key to the success of the application and end result.
Epoxy strength and adhesive properties are very important to a successful project but so too is proper surface preparation.
For high strength, durable bonds, surfaces must be clean, dry and thoroughly abraded removing previous surface coatings. This is because the strength of the bond relies on the ability of the epoxy to mechanically ‘key’ into the surface, unless you are bonding to partially cured epoxy.
This page covers:
Three-step surface preparation for good adhesion
Special preparation techniques for different materials
Tip for first-time users: conduct an adhesion test
Three-step surface preparation for good adhesion
The following three steps of surface preparation are a critical part of any secondary bonding operation.
1. Clean
Bonding surfaces must be free of any contaminants such as grease, oil, wax or mould release. Clean contaminated surfaces with a solvent then wipe the surface with fresh paper towels before the solvent dries. Before you start sanding, clean surfaces to avoid abrading the contaminant into the surface.
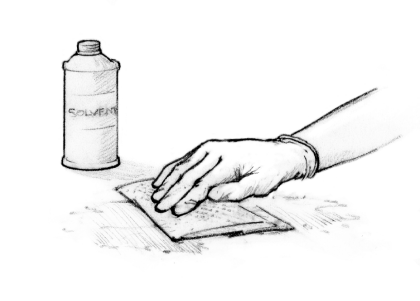
Clean the surface. Use a solvent if necessary to remove all contaminates.
2. Dry
All bonding surfaces must be as dry as possible for good adhesion. If necessary, accelerate drying by warming the bonding surface with a hot air gun, hair dryer or heat lamp. Use fans to move the air around in confined or enclosed spaces. If you are working outdoors, be sure to guard against condensation. Take particular care whenever the temperature of the work environment changes.
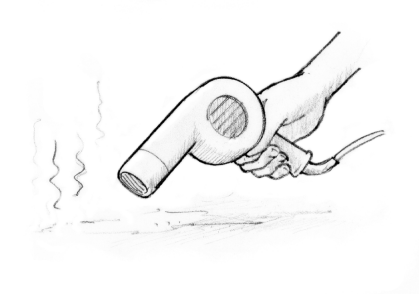
Dry the surface. Allow the surface to dry thoroughly or use heat or a fan to speed drying.
3. Sand
Thoroughly abrade hardwoods and non-porous surfaces with 80-grit aluminium oxide paper to provide a good mechanical ‘key’ for the epoxy. Ensure that the surface to be bonded is solid. Remove any flaking, chalking, blistering or old coating before you start sanding. Remove all dust after you have finished sanding.
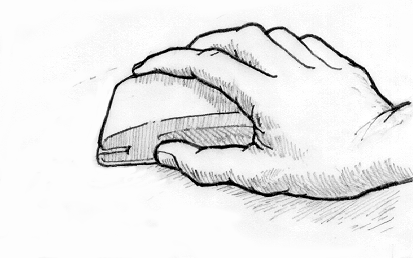
Sand non-porous surfaces. Provide a texture for epoxy to key into.
Special preparation techniques for different materials
Some surfaces require extra preparation or particular care before moving on to the next stage, like bonding or fairing. This table contains surface preparation guidance for various metals, woods and other miscellaneous materials.
| Material | Preparation Technique |
|---|---|
| METAL | |
| Aluminium | Non-anodised material must be degreased and either thoroughly abraded or chemically etched, (sulphuric acid/sodium dichromate solution or branded aluminium etch compound). |
| Anodised aluminium (and alloys) | Anodised material must be bonded as quickly as possible after degreasing and abrading – certainly within 30 minutes. |
| Hard anodised aluminium alloy | Hard anodised material must be stripped by abrasive blasting or by etching in sulphuric acid/sodium dichromate solution or branded aluminium etch compound. Unstripped metal is not suitable for bonding. |
| Metals | Metals must have all previous surface pre-treatments and contaminants, such as rust, removed. To take the surface back to the bare metal, thoroughly degrease then abrade with a coarse paper, such as 80-grit, or grit blast and then degrease again. The use of an adhesion promoter is advised on non-ferrous metal substrates. |
| Mild steel | Degrease and then thoroughly abrade, removing all contamination to expose bright metal. Grit blasting is the ideal method. Apply epoxy as soon as possible – certainly within 4 hours after the surface has been prepared. |
| Stainless steel | Degrease and then thoroughly abrade, removing all contamination and stainless coating to expose bright metal. Grit blasting is the ideal method. Apply epoxy as soon as possible – certainly within 4 hours after the surface has been prepared. Then sand or wet-sand the epoxy into the surface. Recoat or bond after the first coat gels. |
| WOOD | |
| Hardwoods | Thoroughly abrade with 80-grit paper and remove dust before coating. |
| Porous woods | No special preparation needed but it is advisable to abrade with a medium grit paper to open pores. Remove dust. |
| Teak/oily woods | Wipe the surface with solvent or pure acetone. When the solvent has evaporated, abrade with 80-grit paper. Clean the sanding dust away and then wipe the abraded surface with solvent. The solvent dries the oil at the surface and allows the epoxy to penetrate. Ensure the solvent has evaporated before coating, but apply the epoxy within 15 minutes of the solvent wipe. |
| OTHER | |
| Concrete | Remove all previous coatings and abrade with a stiff wire brush. Remove all dust and debris before coating. |
| Cured epoxy | Amine blush can appear as a wax like film on cured epoxy surfaces. It is a by-product of the curing process and is more noticeable in cool, moist conditions. Amine blush can clog sandpaper and inhibit subsequent bonding, but it is water soluble and can easily be removed. It is not unreasonable to assume it has formed on any cured epoxy surface. To remove the blush, thoroughly wash the surface with clean water and an abrasive pad. Dry the surface with fresh paper towels to remove the dissolved blush before it dries on the surface. Sand any remaining glossy areas with 80-grit sandpaper and clean. Wet-sanding will also remove the amine blush. If a release fabric or peel ply is applied over the surface of fresh epoxy, amine blush will be removed when the release fabric is peeled from the cured epoxy and no additional sanding is required. Epoxy surfaces that are still tacky, i.e. not fully cured, may be bonded to or coated with epoxy without washing or sanding. Allow epoxy surfaces to cure fully before applying coatings other than epoxy, such as paints, bottom paints, varnishes and gelcoats. Then wash, sand, clean and follow coating manufacturer’s instructions. |
| Ferrocement | Remove all previous paints and coatings by wet sand blasting. This is less aggressive than using dry sand and should not damage the sound surface. After blasting, laitance – a milky deposit – may be visible on the surface or rust from the reinforcing wires may be seen. If so, it is necessary to wash with dilute solution of hydrochloric acid. This should be fresh water with a 4- 5% addition of hydrochloric acid. Wash thoroughly with water and allow to dry completely before coating. |
| Plastic | Adhesion varies. If a plastic is impervious to solvents such as acetone, epoxy generally will not bond to it. Soft, flexible plastics such as polyethylene, polypropylene, nylon and Plexiglas fall into this category. Hard, rigid plastics such as PVC, ABS, polycarbonate and styrene provide better adhesion with good surface preparation and adequate bonding area. After sanding, flame oxidising, where the flame of a propane torch is quickly passed over the surface without melting the plastic, can improve bonding in some plastics. For best results when working with plastic use WEST SYSTEM G/flex® epoxy. |
| Polyester/GRP | Remove contamination with solvent. Thoroughly abrade with 80-grit paper to a dull finish and remove dust. |
Tip for first-time users:
conduct an adhesion test
When you are looking to bond any type of material, it is a good idea to conduct an adhesion test first to check the surface is properly prepared. That way you can be sure that the adhesive will work on your real project.